Content
Classmunity deposits the funds you raise through campaigns automatically into your District’s bank account(s). The Classmunity platform allows you to associate multiple bank accounts with your micro-site, providing you the flexibility to choose the appropriate account for each campaign. Therefore it is imperative that your District always has at least one active bank account in order to receive deposits.
The number of associated bank accounts your district can set up is dependent on your subscription plan:
| Plan: | # of Bank Accounts: |
| Basic | 1 |
| Pro | 3 |
| Ultimate | 10 |
Fund Transfer Schedule:
Credit card donations for your campaign are transferred on a rolling basis on the 1st and 15th of the month. You can view a list of all pending transfers as well as completed transfers on the “Fund Transfers” page within your District’s administrative panel.
How to Add a Bank Account:
In order for Classmunity to transfer funds to your District’s bank account(s), you must associate the account(s) with your District’s micro-site. Federal banking laws require that Classmunity verify the identity and ownership of the account(s) as well as an authorized account manager.
To add a bank account to your District’s microsite:
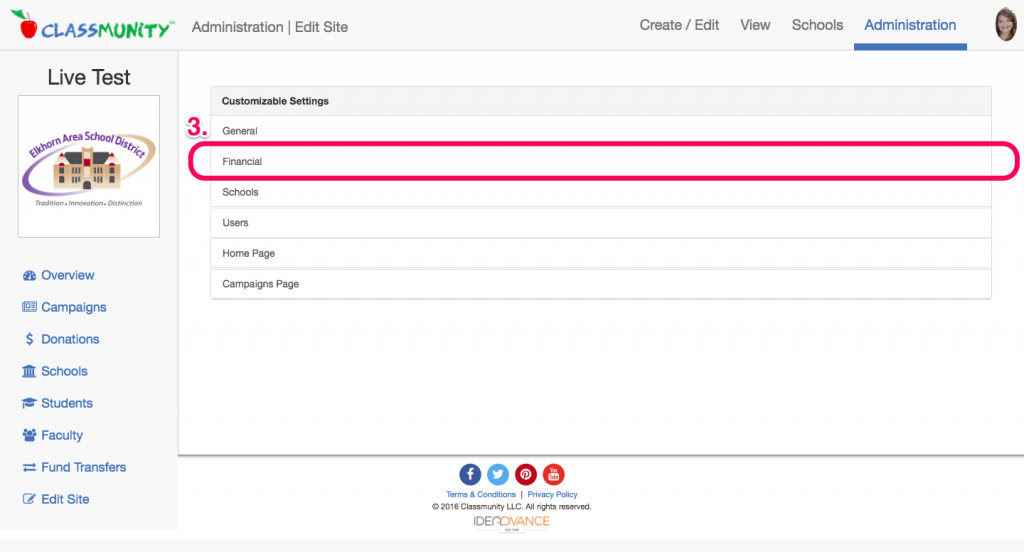
- Navigate to the administration dashboard.
- Select “Edit Site” on the left hand side of the admin dashboard.

- Select “Financial” from the Customization Settings. This will open a window displaying all of the bank accounts currently associated with your district. In addition to adding a new account, you can disable and edit existing accounts within this window.
- Select the
 button to add a new account.
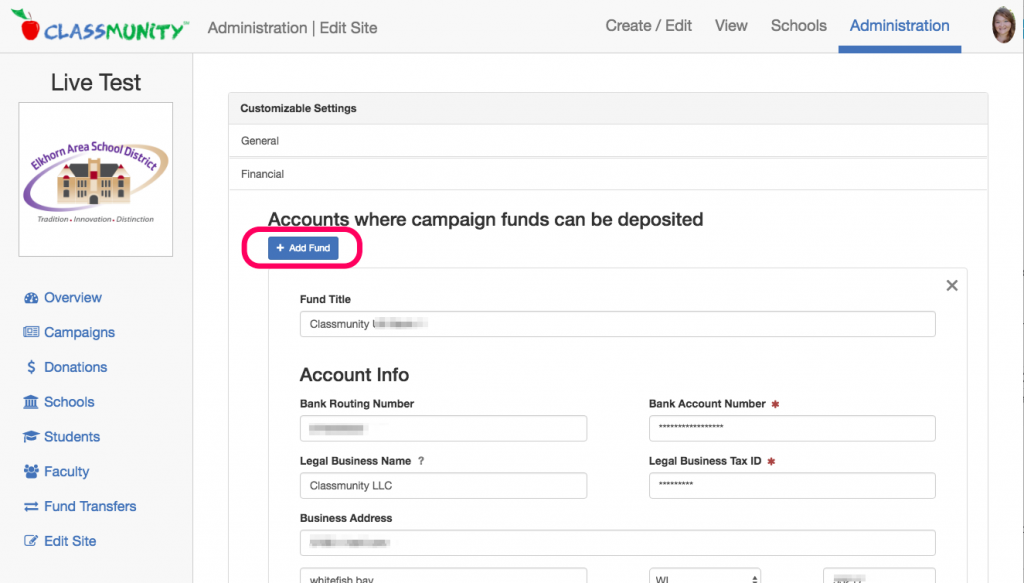
- Enter the requested information, ensuring that the information provided matches the information on the account.
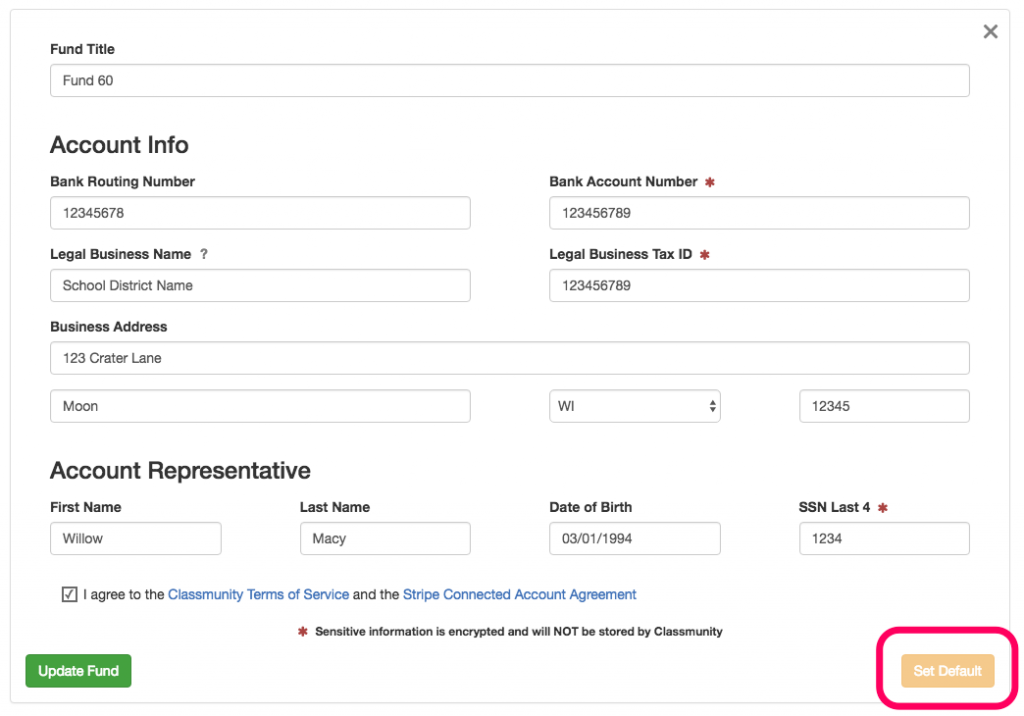
- Fund Title – The name you would like to give this account within your Classmunity Platform.
Account Information:
- Bank Routing Number – Your bank’s routing number.
- Bank Account Number – The account number for your bank account. Classmunity, will not store this information on its server. The account number is encrypted and stored by our payment processor in its fully PCI compliant data center.
- Legal Business Name – The legal name of the entity that owns the bank account. In many cases this will be your school district.
- Legal Business Tax ID – The Federal Tax ID associated with the entity that owns the bank account. This will be the tax ID that your bank has on record for the account.
Account Representative Information:
- First Name – The first name of the account representative, and not the legal business name.
- Last Name – The last name of the account representative, and not the legal business name.
- Date of Birth – The date of birth for the account representative.
- SSN Last 4 – The last 4 digits of the account representative SSN.
- Review the Classmunity Terms of Service and the Stripe Connected Account Agreement. If you agree, click the checkbox and and then select update fund.
- You have the option of setting this account as the default account for your District. Campaigns that don’t have a specific account selected will have their donations automatically deposited in your District’s default account. The first account added to your micro-site will automatically be flagged as the default account.
How to Update a Bank Account:
Some situations will require the updating bank account associated with your Classmunity platform.
To do this you will follow steps 1-3 from above to locate your financial settings. Instead of adding an account at step 4 you will edit the existing account in need of updating. When you have updated the information you will click “Update Fund” at the bottom left of the funds section.
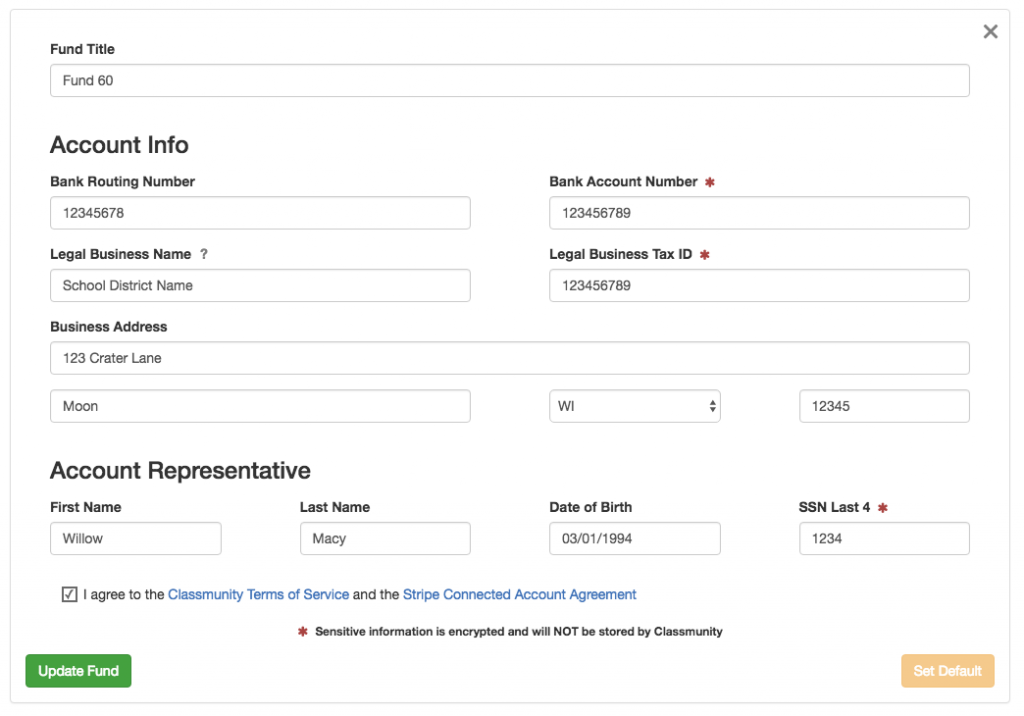
How to Set a Default Bank Account:
- Navigate to the administration dashboard.
- Select “Edit Site” on the left hand side of the admin dashboard.

- Select “Financial” from the Customization Settings. This will open a window displaying all of the bank accounts currently associated with your district. In addition to adding a new account, you can disable and edit existing accounts within this window.
- Find the account you would like to set as default, and click on the “Set Default” button for the account