
The Classmunity mobile app is designed to help you and your volunteers collect donations on the go. Our easy to use application lets anyone process donations for your fundraiser – all they need is a smartphone, the app, and your approval. This document, walks you through the steps to get you started, as well as covering some of the more advanced features of the app. The Classmunity App is a free download on both the iOS and Android stores.
Getting Started
- Begin by tapping the Classmunity icon on your home screen. You will be prompted to sign in with your Classmunity account. If you do not have a Classmunity account, you must create one.

- When you log in, you will see a list of school districts associated with your Classmunity account. Select the district for which you want to process a payment.

- You will now view a list of all the campaigns from your district. You may scroll through the list to find the campaign you are collecting donations for, or type the name into the search bar.Note: A campaign that is listed as “In Progress” is ongoing. A campaign listed as “Completed” has ended and is no longer accepting donations
- You can view a fundraising campaign by tapping on it. You can see more details of the campaign by tapping “View Details”. You will see a list of events associated with the fundraising campaign. Tap the one associated with your current event.

- This brings you to the event view. There are two tabs: Transactions and Payment Processors. In the Tansactions view, you will see a row of pre-set buttons. These correspond to monetary values set by the organizer of the event, and will typically reflect frequently used sums of money. For example, if you are selling spirit wear at a football game, and one of the most popular items is a school t-shirt for $25, the organizer would likely have set $25 to one of those values. Below the buttons is a list of transactions. You may tap on any of them to see more information. The Payment Processors allows authorized individuals to give more people the ability to process payments for the event This process will be explained in detail in Section XYZ.
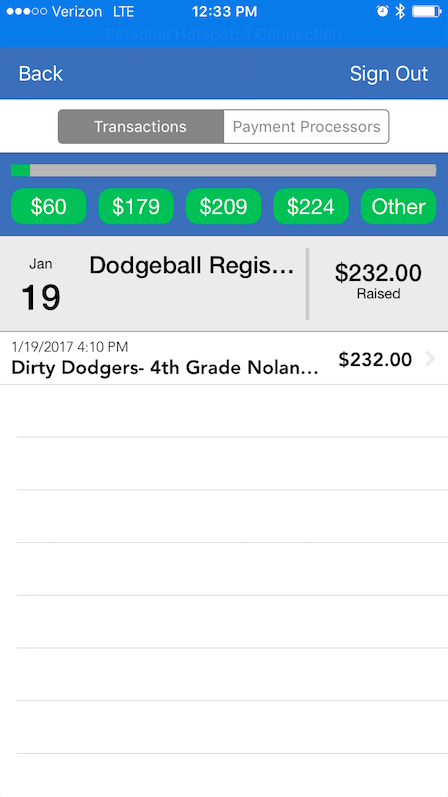 To process a transaction, be sure that you are in the Transactions tab of the event view. Then tap the button that corresponds to the If the amount is not listed, tap the “Other” button.
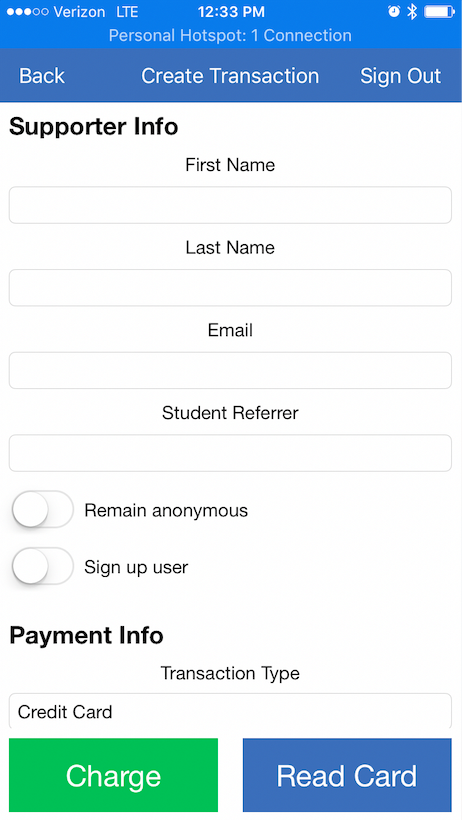
- Now you should see the payment processing screen. Let’s take a quick tour of the elements of this screen:
- First Name/Last Name: You will need to provide the name and email address for the donor. This will be visible to the campaign organizer, and the name will display on the campaign unless you select “Remain anonymous” below. T
- Email: The user’s email address, where a thank you note will be emailed to the donor. It also serves as a receipt.
- Student Referrer: This is used to keep track of which student should get credit for the donation (e.g. if students get incentives for raising funds).
- Remain Anonymous: This makes the donor appear as “Anonymous” on the campaign, although the campaign creator can still see the donor’s name.
- Sign Up User: If a donor would like to have a Classmunity account created, you can turn this option on. The donor will then receive an email notifying them about their account creation.
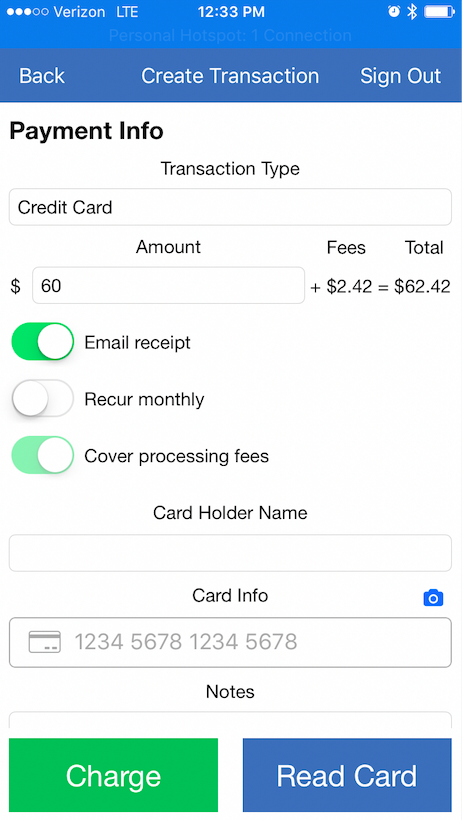
- Transaction Type: This field indicates how the donor is paying: cash, check, or credit card. If you select the
- Amount: This reflects the amount of the donation. If you used one of the amount buttons, this field will be set that value. If you selected “Other”, you will have to enter the dollar amount of the donation.
- Email Receipt: This field lets you indicate if the donor should be sent the thank you note/receipt email. This option is turned on by default.
- Recur Monthly: This field allows a donor to sign up for automatic monthly donations of the amount specified in the Amount field. This option is turned off by default.
- Cover Processing Fees (credit card only): This option lets the donor cover credit card processing and performance fees (if applicable). This option is turned off by default.
- Notes: This field allows the user to make comments on the transaction. These are not viewable to the general public. This is an optional field.
- Reward Info: Some campaigns may offer goods or other rewards for donations. This allows you to keep track of the reward the donor has chosen, as well as information on where to send the reward if applicable. This is an optional field.
After you fill out the pertinent information, tap the “Create” button. You will then see the transaction added to the Transaction screen. Congrats – you’ve just recorded your first donation!

