While you’re working on your fundraiser it’s important to keep track of your expenses for many reasons. Not only will it make the number at the top of your fundraiser reflect the correct amount of money raised for your cause and make it it easier for reimbursements, it is required by many school districts. The expense tracking function helps make keeping track of all expenses made during a fundraiser easy.
1. First step to understanding how to use the expense report role in Classmunity is to find where it’s located. Once you’ve reached your desired fundraiser, you’ll have to scroll to the bottom of the page until you’ve reached the section below the fundraiser’s details.
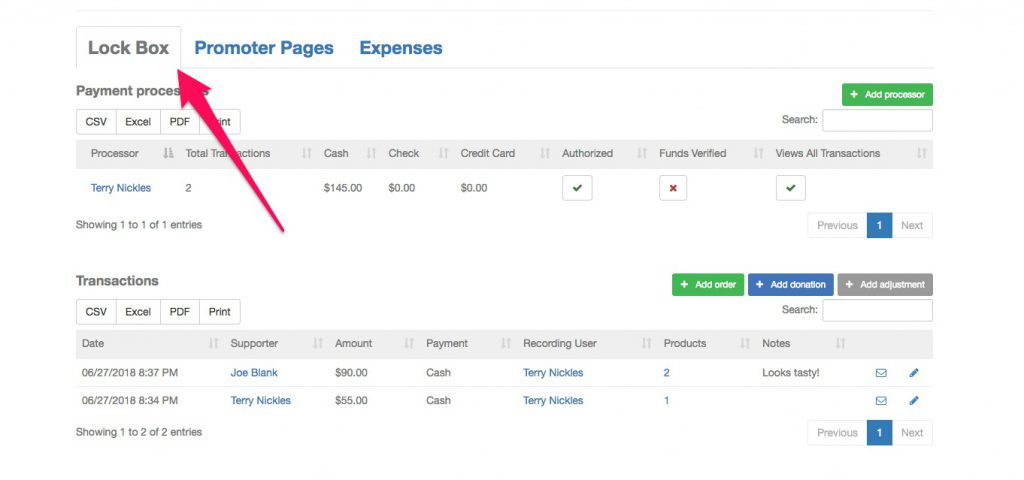
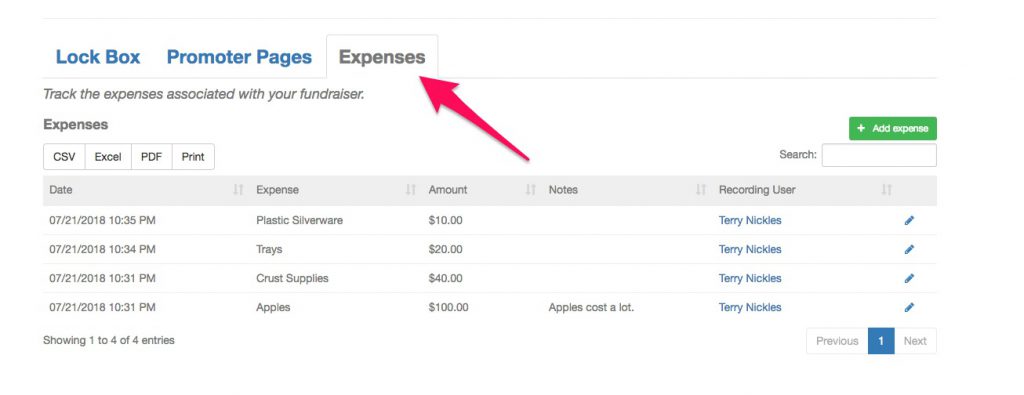
2. After you find this, you’re going to switch viewing screens from Lock Box to Expenses, so you can view and organize your expenses. You can see an example of how this is done below.
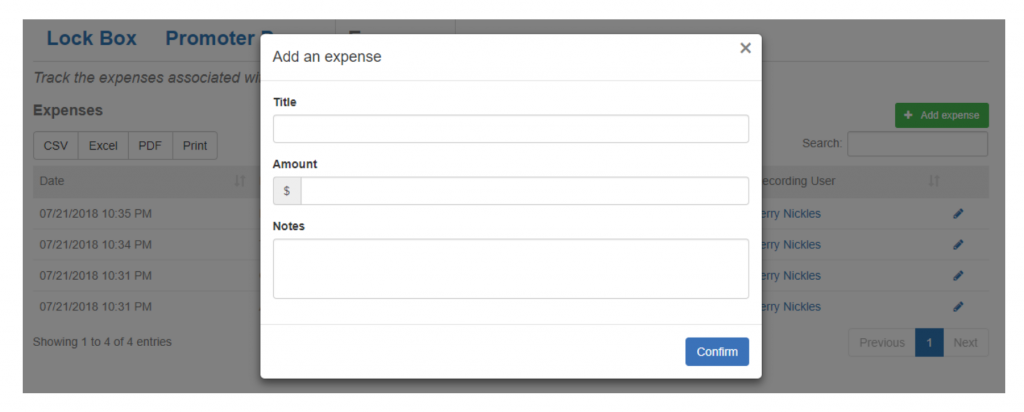
3. Located on the top right there will be a green button that has “Add Expense” which is what you’ll use to add expenses to your fundraiser. A drop box will appear shortly with three boxes that will need to be filled out to post an expense. First, it’ll ask you for the title of the expense and the amount spent. Lastly, it’ll give you an option to add a note where you will be able to describe your expense in greater detail if needed.